In the previous posts, we talked about getting two RPis together as the base of our cluster. Now, we will add possible many more RPis to them.
The main component in adding third and others is the second RPi we prepared. It is in fact the first of the slave nodes. What we will do is to clone RPi and modify a few files to present it as our third node. Then we can do the same for fourth, fifth, etc…
Cloning an RPis is very important. We can use that clone for both adding new RPis and getting regular backups of our cluster nodes. Therefore, the process should include cloning and restoring. One of the best scripts written for this purpose can be found in this page. I used this and definitely recommend that. Please install them first.
After installing the scripts, we will backup the second node with this command:
sysmatt.rpi.backup.gtar
The gtar file, which is an exact copy of node2, will reside under a folder you have chosen. I did not change the default file names and locations but you can do however you like. Here is that gtar file:
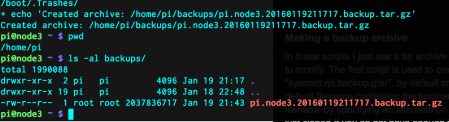
Here, actually we see that it is the clone of node3. That is not important. node2 and node3 are the same.
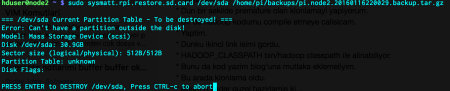
After cloning, we need to restore that image to another SD card. First, we will find the assigned device name of the SD card:
dmesg
Mine was set to be /dev/sda. I moved on as explained by Matt Hoskins:
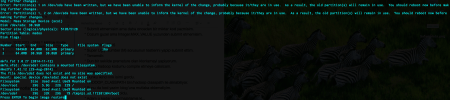
It takes time to copy every single file to the SD so be patient. In the very end, the SD is ready, mounted and waits for modifications:

Here comes the critical part. As can be seen, the fresh copy is mounted as /tmp/pi.sd.172381304. We will change the IP and name of the new node as 192.168.2.112 and node3 respectively.
vim /tmp/pi.sd.172381304/etc/dchpcd.conf
vim /tmp/pi.sd.172381304/etc/hostname
Now we are ready to unmount the drive, put it into our third RPi and run it. If everything is ok, you can see the three RPis with IP Scanner and access to new node by its IP. But your Mac, and the other nodes will not resolve node3, because we need to define it inside /etc/hosts file for all nodes and Mac. Add the following line:
192.168.2.112 node3
Up until now, we can use the user pi. From now on, we will login with hduser for all three nodes.
The node1 contains the slaves information. node3 will be a slave so we will add it to:
vim /opt/hadoop-2.7.1/etc/hadoop/slaves
clean the previous HDFS file system for all three nodes:
rm -rf /hdfs/tmp/*
and format the HDFS file system in node1:
hdfs namenode -format -clusterId CID-1ed51b7f-343a-4c6d-bcb6-5c694c7a4f84
So we successfully added the third node. These steps can be reproduced for other RPis that will be added as slaves.
An optional step is to change the number of replications. When we have only two nodes, it was set to 2 in hdfs-site.xml. After adding the third one, it can be updated to 3 or it can stay at 2. You can change it however you like and your storage permits.
The next post will be about finding an example data and investigating the HDFS properties of the dataset files.

Leave a comment