I was happy that I have many Hadoop installation guides under my belt. During my setup, I followed them step by step. At some point, there may be some glitches but the process was tested and tried, right?
Well, it seems anything can go wrong even with the best tools. In my first attempt, the single node was perfectly fine. The system is open to more problems when the node size increases. I hit one of them while trying to add the second node. The same anomaly happened again on the fourth node. Today, I would like to share that and present the methods to solve it.
What did happen? Frankly I do not know the root cause but when I started the dfs and yarn daemons, I could not see the datanode processes with the jps command. The daemon startup sequence does not show explicit messages. What it does is to dump the events and , if any, errors to respective log files. Each process has its own log file. They are located under your hadoop installation directory.
ls -al /opt/hadoop-2.7.1/logs/
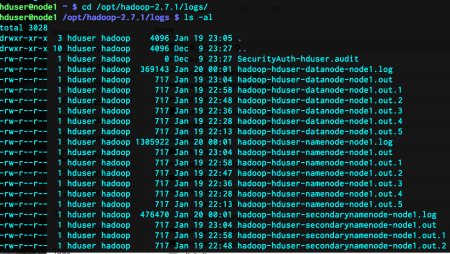
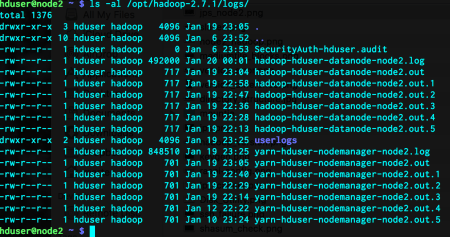
As you can see, node1 has much more log files than node2, since it is the master node. I did not include the other nodes since they are almost exactly the same as node2.
The problem was about the datanode in node1. Henceforth, I read the contents of the file hadoop-hduser-datanode-node1.log. What I saw was this error:

The critical information here is the incompatibility between clusterIDs in different files. Only namenode and datanode stores the clusterIDs and they must be the same. These two files reside under the folder of the HDFS file system. The master node has both of these files while slaves have only the datanode information, since they do not act as namenodes. Let’s see the content of them:
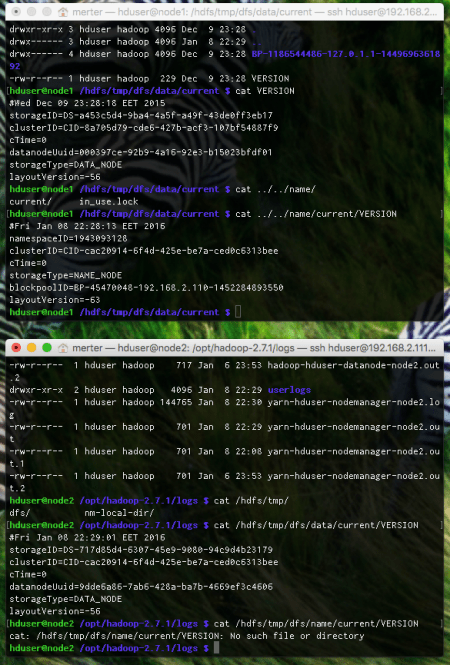
The corresponding files in node1 are
/hdfs/tmp/dfs/data/current/VERSION
/hdfs/tmp/dfs/name/current/VERSION
As you can see, the clusterIDs are different. To decide which one to use, I looked at the namenode file of node2. My reasoning was that, since the namenode of node1 and datanode of node2 are operating normally, the clusterID in datanode of node1 should be changed. For this case, I just set the datanode clusterID of node1 to the namenode clusterID of node1. With that, I was able to put the system up and running.
The plus side of this solution is, we keep the files under the HDFS file system intact. We do not delete anything, format anything etc.
Although I solved this one with the aforementioned solution, it did not help when I added the fourth node to the system. At that time, after formatting the HDFS file system, some of datanodes did not show up. I tried to accomplish the same trick with copying the clusterID of running nodes to problematic ones but it was no avail. Here comes our second solution.
I deleted all content under /hdfs/tmp/ for all nodes.
hduser@node1> rm -rf /hdfs/tmp/*
hduser@node2> rm -rf /hdfs/tmp/*
hduser@node3> rm -rf /hdfs/tmp/*
hduser@node4> rm -rf /hdfs/tmp/*
After all these, I reformatted the namenode, but this time, provided a predefined clusterID:
hduser@node1> hdfs namenode -format -clusterId CID-1ed51b7f-343a-4c6d-bcb6-5c694c7a4f84
I just wanted to be sure that all nodes are assigned to my clusterID. It worked.
The negative side of this solution is that all hdfs content is, unfortunately, wiped out.

Leave a comment