Raspberry Pi is good for toy clustering but it is dead slow for real tasks. The third version won’t change that fact. I was planning to add more RPis to my cluster but it seems to be a wasted effort. After I met DigitalOcean (I mean VPS in general), my whole perspective is changed. Instead of running on RPis, the droplets become mush more suitable targets for me. I decided to give them a try.
An RPi with a decent SD card is about $45. It is four and a half months of $10 per month plan from DigitalOcean. I had 4 RPis, translating into one and a half year VPS payment. The snapshot / backup (with extra money) features are bonus. Uptime is a bonus. Performance is a huge bonus. Anytime-connection is another bonus. Mobility is the ultimate bonus. It is not easy to move the RPis around. All in all, the VPS investment seem to justify itself, right?
There is one catch. The calculation above takes only one droplet into account. What about the other droplets (nodes) of a cluster? We can have many more than one. That’s fine but it will quickly add up to a dramatic increase in spending. So what if we have one droplet always fully operational and create other droplets from time to time, when we really need them?
I mentioned that in my previous post. Destroying/recreating can be a pain. To be honest, I did not do any experiments before writing that. It is unfair, so this time I toyed with the idea and setup a small cluster with two droplets. I also destroy/recreate and saw that it is not as painful as I have expected. So without further ado, let me tell my story in detail.
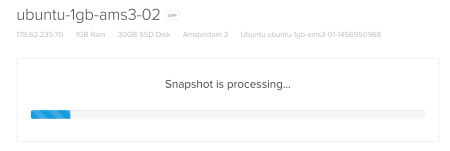
At the beginning I have one droplet and not mush else. The first step is, to create a snapshot of it. We will use that snapshot to create our second droplet in the cluster. To take a snapshot, the droplet must be powered off.
sudo shutdown -h now
In the web interface of DigitalOcean, we can take a snapshot of the droplet. After getting that, the droplet started itself. That’s ok. Now we will create our second droplet.
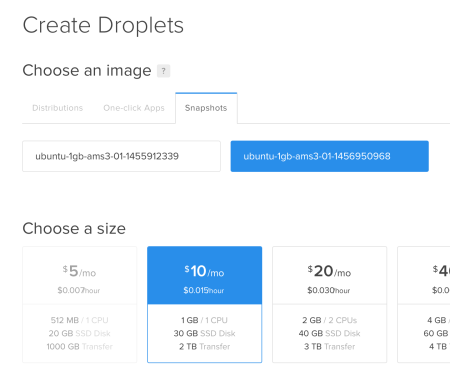
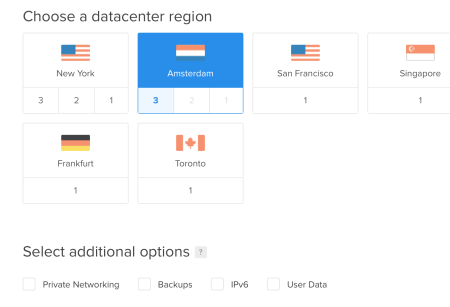
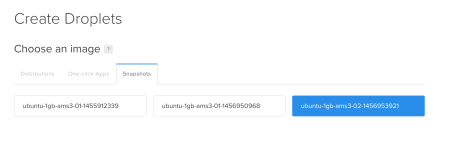
We select one of our snapshots so that we won’t make the same Hadoop installation and arrangements again. The important thing here is that, the new droplet must be in the same datacenter region with the first one.
The hostname and the number of droplets using the same configuration can also be set in here.
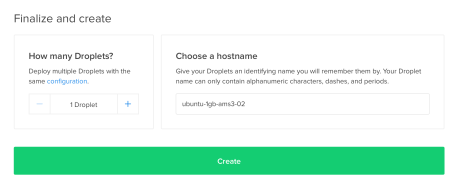
Hitting the Create will start and finish in no more than a few minutes.
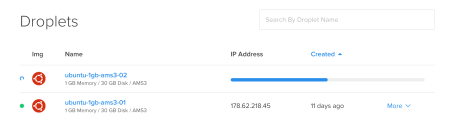
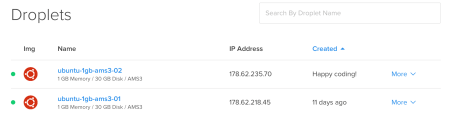
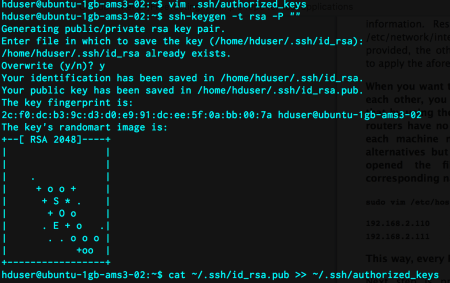
It is that simple to add more than one droplet to the cluster. I only followed my second RPi installation post. I modified the /etc/hosts files of both droplets. I simply put their names and IPs. In droplet 02, I generated a new ssh key and append it to .ssh/authorized_keys file.
I changed the replication count to 2 in hdfs-site.xml file. Moreover, I edited the slaves file. Logged in to two droplets from droplet 01. Then, run the following command in both droplets to clean the hdfs filesystem.
rm -rf /hdfs/tmp/*
I format the hdfs in droplet 01. Now it is time to run the daemons. I verified that everything is ok and run the wordcount example. It works! This shows us that we are on the right track. Applying the same principles, we can add many more droplets to the same cluster.
We want to have a cluster with many droplets but we do not want to pay lots of money. So, what we should do is that, save the droplet configuration and run it when we want to. DigitalOcean provides a facility to accomplish that but with a few quirks. Now, I will show you what they are and how to turn them around.
Whenever we want the preserve the state of a droplet, we can take a snapshot of it. Actually, we did this in our previous step, when creating a second droplet from the first one. Now, we in fact have the real second droplet to preserve, we can take the snapshot of it.
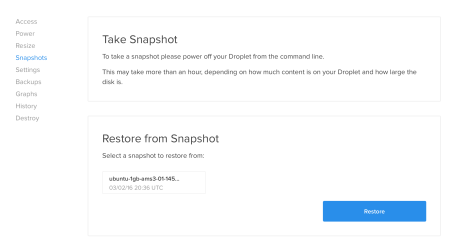
All of our snapshots and backups can be found under the Images link.
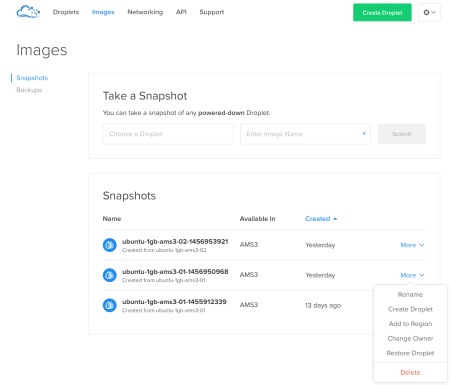
We can directly create a droplet from any of our snapshots. We can also rename or delete those. After the snapshot is created, we will destroy our droplet. The important point here is that, while the destroy operation removes the server and its backups, it WILL NOT remove the snapshots.
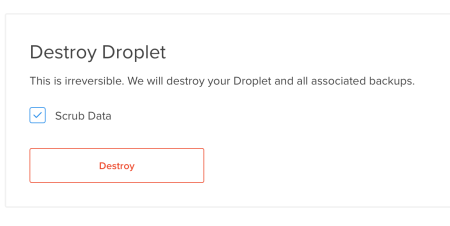
So we are free to recreate the 02 droplet whenever it suits.
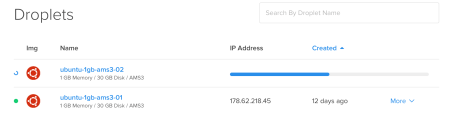
It seems really easy. Power off your droplet, take a snapshot of it, destroy it, recreate that and proceed from where you left off. It is a little bit complicated than that. When we create the droplet 02 from its latest snapshot, we see a different IP. That’s problematic for our case since that IP is used in /etc/hosts file and implicitly in ssh login. This shows itself when we ssh to the second droplet from the first one.
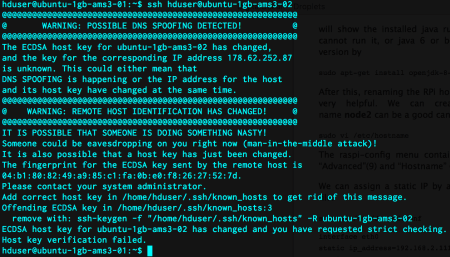
We modify the /etc/hosts file in both droplets and remove the host key of droplet 02 from droplet 01 by the following command:
ssh-keygen -f "/home/hduser/.ssh/known_hosts" -R ubuntu-1gb-ams3-02
To be on the safe side, I also recommend to clean /hdfs/tmp/ folder completely and reformat the hdfs system.
That’s all we need to do. Our 2 droplet cluster is safe and sound again.

Leave a comment